Basic Portrait Techniques - Wilf's RA Club Workshop
I attended a hands-on Basic Portrait Techniques Workshop yesterday with the RA Photo Club. The workshop leader, Wilf Oberthier was aided by club Studio Manager, Rick Harris. Along with me, five other club member participants were treated to an informative morning session of combined instruction and practice. We were aided by our professional model, Melissa - who was obliged to return to a neutral starting pose so that every photographer practiced the art of posing the model.
Here are some of my photos from the workshop which illustrate key learning points. I’ve added some additional aspects of basic technique elements from my notes.
To begin, there are three basic considerations for making good portraits:
- Posing (the pose supports the face)
- Lighting (obtaining and maintaining a pattern which flatters the subject)
- Camera face view positions (full face, two-thirds and profile).
In approaching a shooting session, in the studio, or using natural light, the photographer is best well-served by following these steps:
- Pose the subject taking their unique attributes into account
- Modify the lighting to produce the desired look and effect
- Refine - before pressing the shutter button; seek out the little adjustments that perfect the image.
Poses
The subject’s body should rarely be squared to the camera. The shoulders should be placed at approximately 45 degrees angle. When the shoulders are squared toward the light, this is the Basic Pose, used for both male and female subjects.
Basic pose, two-thirds view, one key light

The shoulders facing away from the light is called the Feminine Pose. This pose is not usually used for males, but always used for both males and females when shooting Profile face views.
Feminine pose, full face view, one key light

In posing, certain techniques contribute to a pleasing appearance. Leaning the body forward produces a slimming effect. Bending arms away from the body also reduces the effect of a large torso. Crossing the front over the rear leg tends to drop the rear shoulder which is a better look. In the Feminine pose, the subject’s head should be tilted toward the high shoulder.
Lighting
The position and the strength of light affects the shape and intensity of shadows upon the face.
A light positioned high above, from in front of the subject produces a Butterfly Shadow directly under the nose. A split light, (from the side) produces the dramatic effect associated with profile view shots. Broad lighting is when the light falls across the full edge of the face and is to be avoided. A sharp triangle of light under the eye is in the Rembrandt style and is not flattering in most cases.
Short loop lighting is best for classic portraiture. A short, small shadow, facing the camera appears under one side of the nose. This is the most flattering lighting effect for most subjects in most cases.
Using a single light source, a Key Light, produces sharper, more distinct shadows. Adding a second light, a Fill Light, balances the light and smoothes the shadows. A Fill Light is usually set at 1 1/2 to 2 Stops lees than the Key Light.
The closer and bigger the light source results in softer light wrapping around the subject.
Face View
Full Face View
The subject’s face is aimed squarely at the camera lens. Both ears are visible.
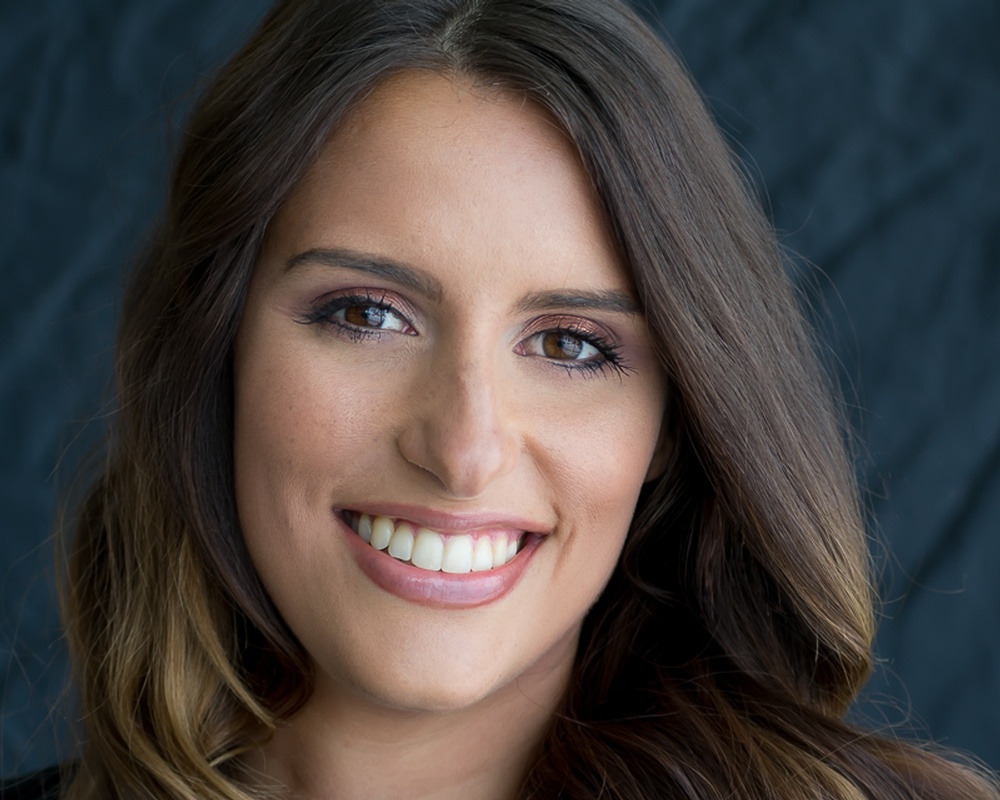
Feminine pose, full face view, short loop lighting

Two-thirds View
The subject’s face is turned slightly away from the camera lens. Usually only one ear is seen. Make sure that a small bit of flesh is visible at the outer edge of the further eye. Also that the tip of the nose does extend past the cheek. The two-thirds view is usually the most flattering.
Basic pose, two-thirds face view, short loop lighting

Profile View
The face is turned at right angles to the camera lens. This view tends to be a dramatic. The effect can be emphasized by using harder lighting, or higher aspect ratios between light sources.
Profile view

Other Face View Considerations
For Head and Shoulder shots the camera should be positioned slightly above head height and shooting at a gentle downward angle.
Full Face and Two-Thirds Views should be shot in Portrait Orientation. Profile View should be shot in Landscape Orientation (experiment with tilting the camera to obtain some different looks).
If available, a tripod is very helpful to help ensure tack sharp focus and ideal compositions.
When taking portraits, the subject’s expression is everything. The photographer must make considerable effort to engage the subject and keep them relaxed and comfortable and yet fully attentive. Ideally the photographer will keep up a steady dialogue. Solid technique can bring you so far, a wonderfully expressive subject can convey something magical about your subject.
The focus point is usually on the nearest eye. The eye is where the viewers attention is directed. Having the subject’s eyes looking directly at the camera, (or six inches above, which helps keep the eyes open more) creates the most intimate connection with the viewer. Having the subject gaze off slightly creates a contemplative mood which can add interest. Watch for the shape and amount of whites of the eye relative to the pupil and iris.
Basic pose, full face view, short loop lighting, key and fill lights

Clothing
Advise the subjects to wear colours in dark to medium tones. Black is the most flattering and helps focus attention on the face. Avoid bright reds and yellows and anything with patterns.
Background
In the studio the photographer exercises the greatest degree of control in producing a distraction-free background. Unless the background is an element of the story, keep the background as unobtrusive as possible. A wide aperture, producing a narrow depth-of-file is an often employed technique.
Conclusion
As I understand it, the goal of a portrait photographer is to produce as flattering an image of the subject as possible. Following the basic techniques which I learned in Wilf’s Oberthier’s RA Photo Club Basic Portrait Workshop will help me as I strive to improve my skills through practice.
I hope that you’ll find these notes helpful in your own growth as a portrait photographer.